
Share your experience with the founderhere!

Nishil Patel
Oct 13, 2026
4 min read
Last Updated Oct 13, 2026
You can record a screen on Chromebook with the BetterBugs.io free Chrome extension with quick sharing features or using the built-in Screen capture tool in ChromeOS. Here, we have provided an easy-to-follow guide to record your Chromebook screen with clear steps in 2027.
1.
How to Screen Record on a Chromebook with Audio
2.
Method 1: How to Record Screen on a Chromebook Using BetterBugs.io — Free Tool | Easiest Method in 2027
3.
Method 2: How to screen record on Chromebook using the Screen Capture tool (Built-in Tool; Chrome OS 89 or later)
4.
How to Find Screen Recordings (or Screenshots) in Chromebook?
5.
FAQs
You can screen record with audio on a Chromebook using:
Also Read: How to Screen Record on Mac for Quick Sharing
BetterBugs.io enables you to record the screen in 2 modes (Tab or Window) and supports up to 15 mins of recording (5 mins limit in the free tier).
It works best if you want to:
Also Read: Best Bird Eats Bug (now Bug Capture for BrowserStack) Alternative [2027] for bug reporting
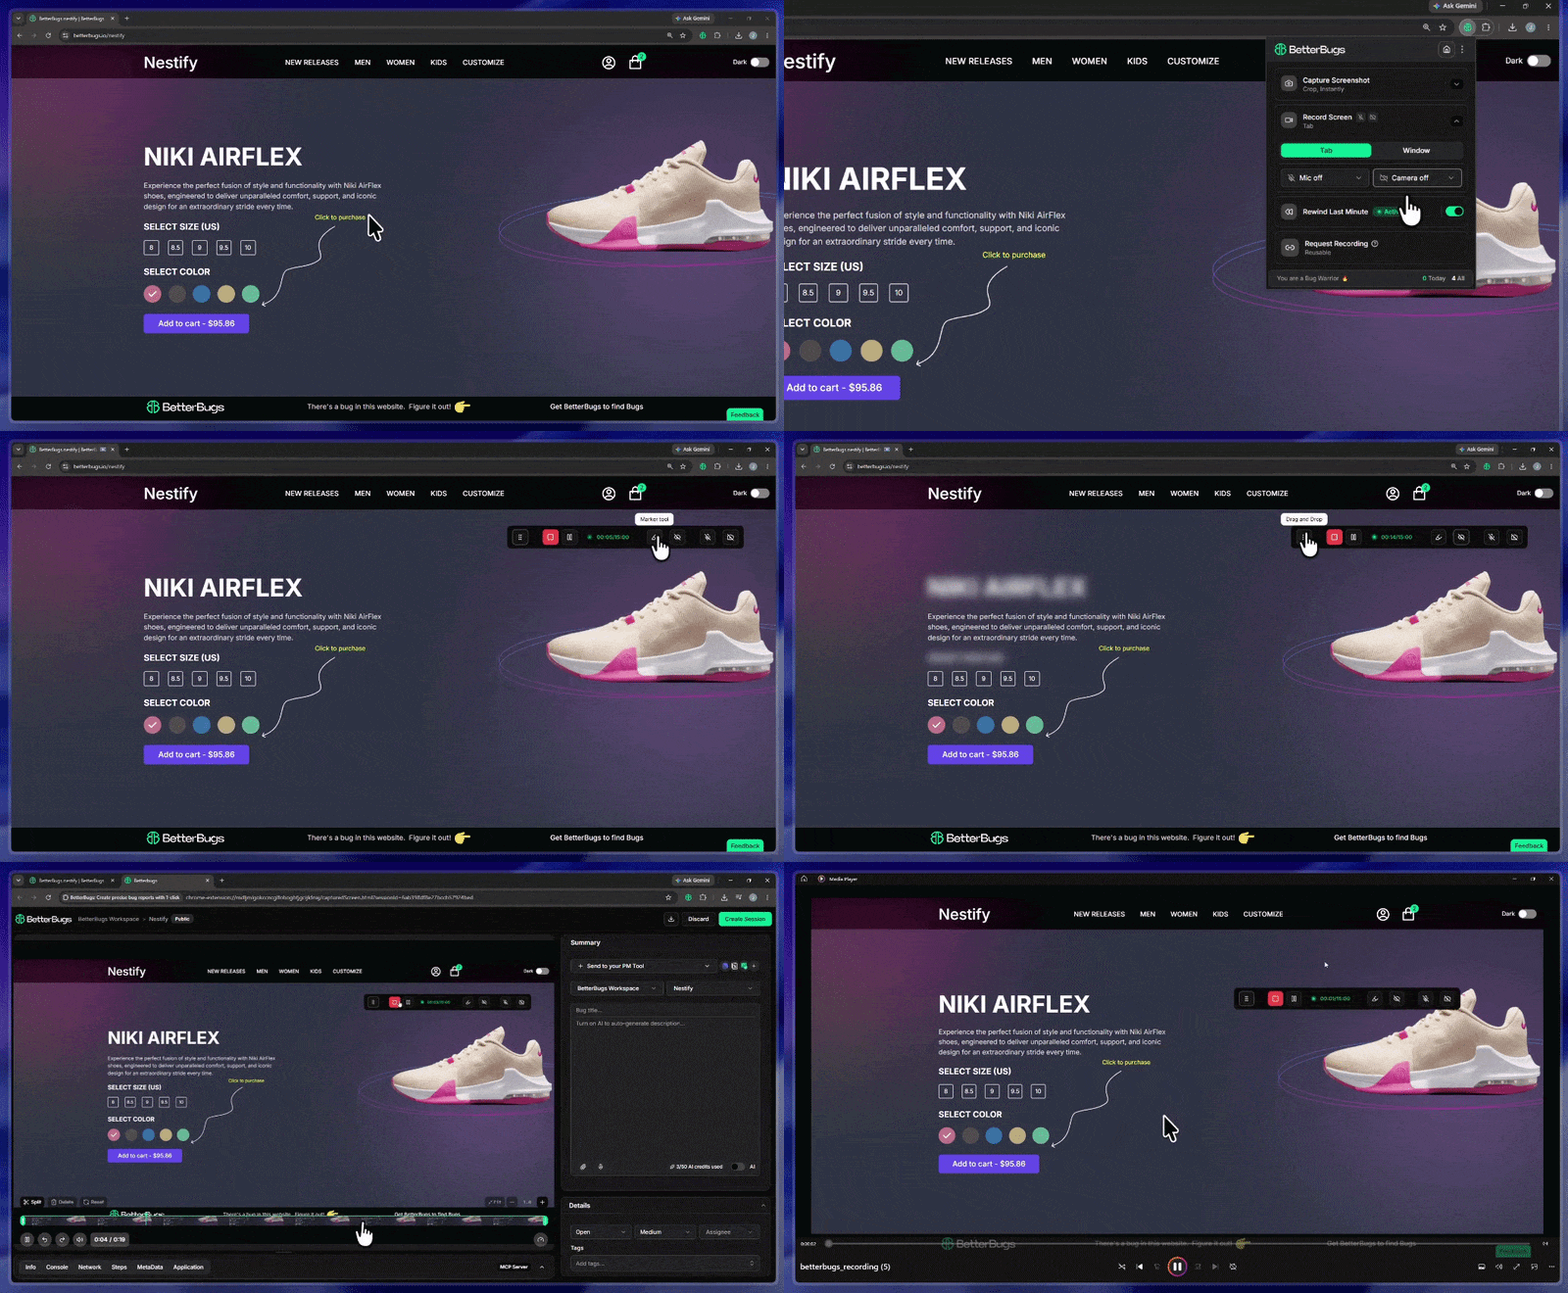
Screen Record on Chromebook using BetterBugs.io in 2027 | Video Demo
Install the BetterBugs extension from the Chrome Web Store. Pin it to your browser toolbar for easy access.
Click the extension icon and register for an account (with OTP verification) to manage your screen recordings from a central place. You can sign up using your:
Open Chrome and go to the specific web app or webpage you’d like to record.
Open BetterBugs from your browser and click the “Record Screen” dropdown to select recording mode.

Select mode:
PRO TIP: While using the “Window” mode for screen recording in BetterBugs, once you start recording and minimize the browser, your entire screen will record.
You can toggle on the microphone to include voice notes. Plus, you can add a video message within the screen recording. It’s perfect for adding detailed walkthroughs or personalized feedback with the video as you record.

Choose what to record (Tab or Window) and start.
A brief countdown (5 seconds) will appear before recording begins with a pre-recording layout. You’ll see a floating toolbar with options to:
Click the red "Finish" button on the toolbar to wrap up your session.
Click the “Download” icon at the top right to save to your system.
Give your recording a relevant title, then click “Create Session” at the top right to save to your BetterBugs account. A new browser tab opens with your screen recording. You can share the tab link to others for quick access or for download.
Also Read: Best Marker.io Alternative in 2026 | BetterBugs.io for Bug Reporting and Client Feedback
On a Chromebook, you can record the:
Also Read: How to take a screenshot on Mac for quick sharing [Step-by-step Guide]
Steps to record a screen on Chromebook using the Screen Capture tool:
On Chromebook, open the screen or app you want to record.
Use the shortcut "Shift + Ctrl + Show windows" on your keyboard. This opens the screen capture toolbar at the bottom of your screen.

NOTE: The Show windows key is the rectangle-shaped icon with two vertical lines in the function row. Or, some Chromebooks may have a Screenshot key (camera icon) instead.
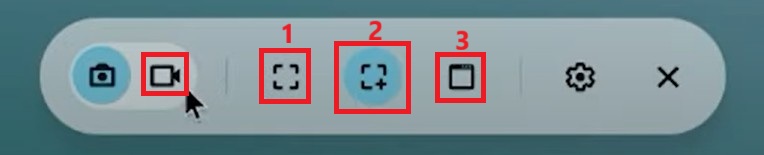
From the screen capture toolbar (in the menu at the bottom), click the “video camera” button and select the recording mode you want to use:
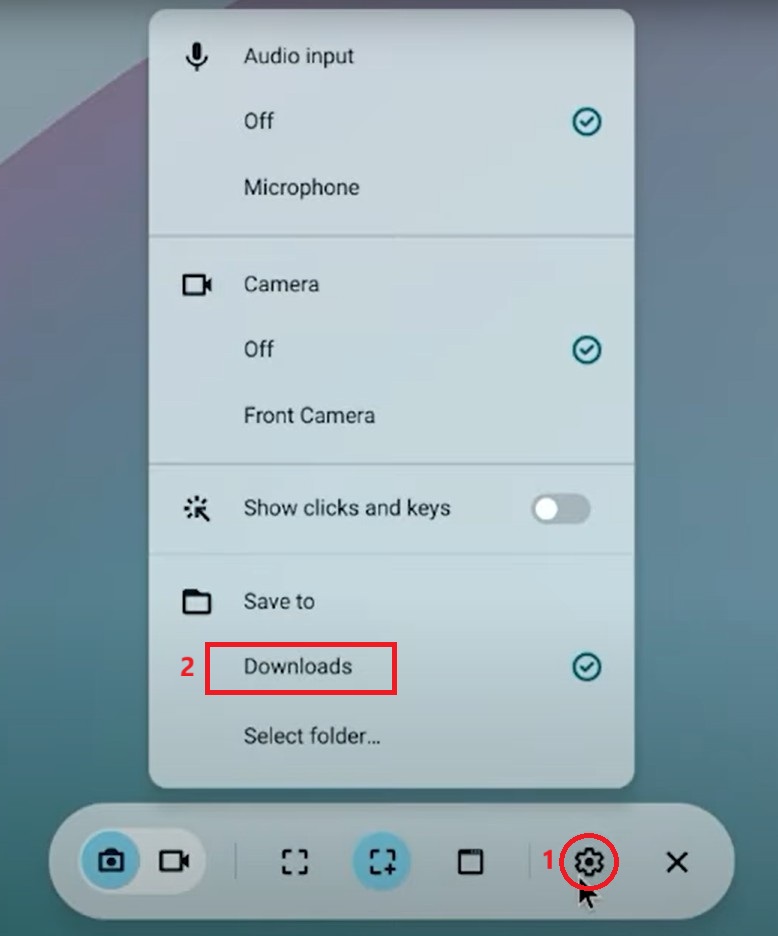
Optionally, you can click the settings icon from the toolbar to set your preferences for the recording:
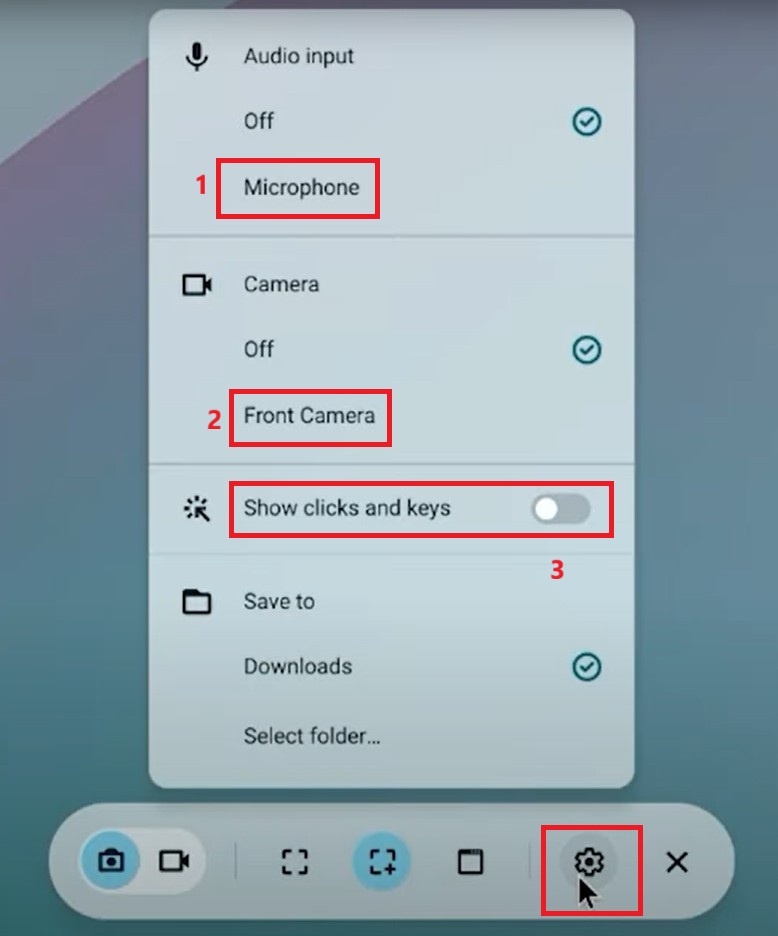
Pro Tip: For the key combos getting captured, only the modifier key combos gets captured. This safeguards your privacy while recording screens.
Once you’re good with the recording mode + any other options (with audio, front cam, and clicks and keys), here’s how to start recording with each mode:

Once you're done with the recording, hit the red "stop" button on the bottom right corner of the screen (in the shelf).
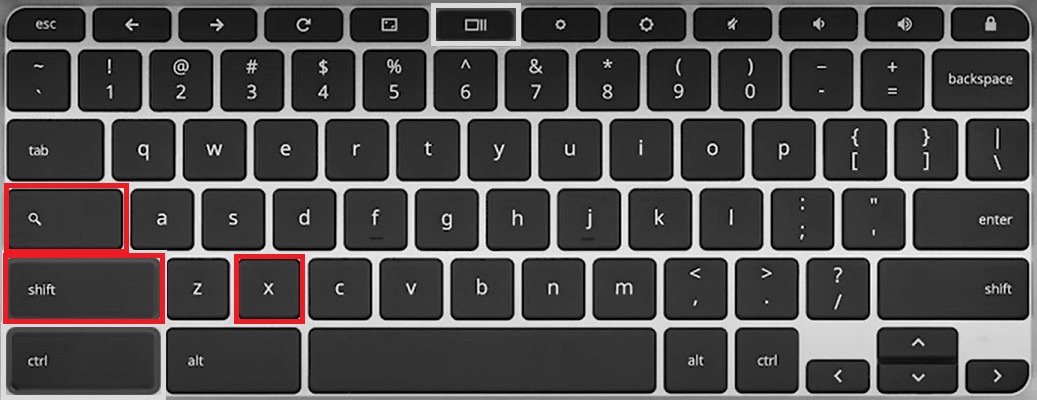
Alternatively, you can use the shortcut "Search + Shift + X" to stop the recording.
The screen recording will be saved as a video file in the default (Documents folder) or the selected saving location. Chrome OS auto-saves your recording with the .webm format and gives the video a default file name with the date and time.
Chromebook saves you screen recordings to the Documents folder by default. Here’s how you can find them:
Open the screenshot toolbar with the "Shift + Ctrl + Show windows" shortcut.
From the screen recording toolbar, click on “Documents” to locate your saved recordings.
Nishil is a successful serial entrepreneur. He has more than a decade of experience in the software industry. He advocates for a culture of excellence in every software product.
Meet the Author: Nishil Patel, CEO, and Co-founder of BetterBugs. With a passion for innovation and a mission to improve software quality.
We never spam.